First 3 MUST FOLLOW Steps
When Starting Your Model Train Layout..!
http://www.modeltrainforum.com/showthread.php?t=489
You are about to learn the first three steps to follow when building your model railroad.
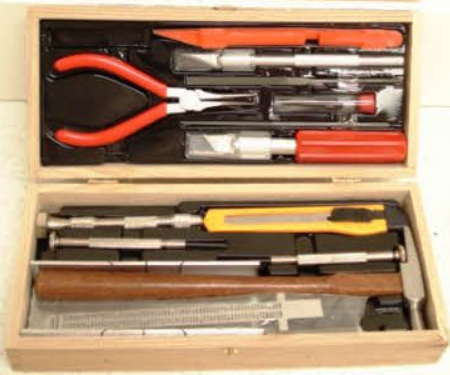
Here’s a breakdown of of the most common tools needed to get started:
- various carpenter tools
- electric drill and drill bits
- soldering gun and soldering pencil
- needle-nose pliers, wire strippers, tweezers and jewelers files
Step 1
First, you must have the most common tools as listed above to ensure you are prepared for the various stages of layout building. It will be very important to have the correct tools on hand otherwise you might get caught in a situation where your caulking is drying but you have to run to the store to get a putty shovel.
Pros: Effective technique that saves time and is easy to do.
Cons: It is difficult to remove the track once you have laid it down or if you want to change your track arrangement.
If you don’t want to use sealant, another time tested option is to use track nails.
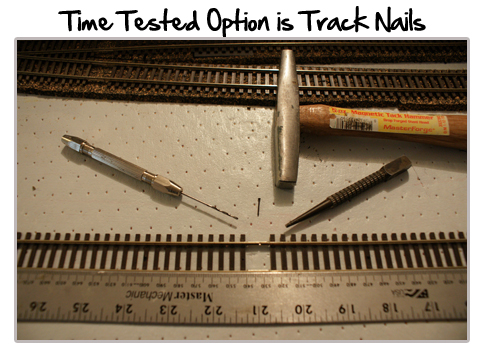
The most important things to remember are to put the holes in for the track nails on the track itself and then hammer the nails into place.
On tracks such as the Atlas Flex Track, the ties are smooth on the top but when you flip it over there are tiny little dimples in the back of the track. We need to drill those out before we can install the spikes. In order to drill the holes, the best item to use is a pin vise with a number 65 bit installed.
Setting our track on a piece of wood such as bench work provides a nice surface to do the drilling and ensures your holes are being drilled on a stable area.
Instructions:
First off, take the bit put it into the dimples of the flipped over the track and drill the holes. Once the holes are drilled you can flip over your track and place it on the layout, where you have drawn the scales to be placed. Once you have placed it down, insert your track nails into the holes and use a nail set and a tack hammer to drive the nails in and secure it into place.
Then just go on down the lines and insert your track nails into the rest of the track and secure you’re the track to the bottom of your model train layout.
Useful Advice:
- Pin vises and track nails can be found at most all hobby shops
- You don’t want to drive the nail so far that it bends the tie
- For a faster way to insert track nails use Dremel tools instead of a pin vise and tack hammer
- If you ever want to change the arrangement of your track, you can simply use some needle nose pliers and pull out the nails from the track ties and you are free to move the tracks around.
This was sure and quick way to lay down trackwork but there’s still 10 other things you must know to be able to run your trains smoothly.
Top 10 Track Laying Must Know How’s
- Stagger all of the joints in the track, roadbed, and sub roadbed
- Avoid humps or dips in the track, especially near curves, turnouts, and places where grades begin or end
- Drive spikes gently, using just enough pressure to seat them without putting a vertical kink in the rail
- If you’re using track nails, drive them gently until they’re snug without distorting the plastic ties
- Carefully align every rail joint and make sure both rails are fully seated in the rail joiners
- Eliminate any potential bump by removing the ties beneath a rail joint, sanding them thinner, and then replacing them
- Smooth the top inside corner of all rail joints with a small file until you can slide a fingernail over the joint without feeling any snagging
- Use a small file to sharpen all switch points to obtain a smooth path for the wheels to follow
- During installation, solder the wires to the underside of the rails so they’ll be hidden by the ballast
- Use a National Model Railroad Association gauge to check and adjust the spacing of the rails and guardrails in turnouts
Next, learn detailed step by step directions on the following:
- Cleaning track
- Grade crossings
- Manual switch controls
- From track plan to benchwork
- Laying road bed
- Easy easements
- Grades
- Laying flextrack on curves
- Sectional track
- Track terminology
The most important part to running smoothly operating model trains is planning trackwork ahead of time. To avoid endless frustration due to derailment issues, dirty tracks and trains that stop moving, understanding the trackwork is crucial. The best feeling in the world as a model railroader is enjoying a fully operation layout with all the bells and whistles.
To master trackwork will take countless hours trying to figure out the exact process for each.
You must know each of the bullet points above to ensure your locomotives do not have erratic stops, derailments or lack of speed on gradients.
Fortunately, you don’t have to spend hours and money with trial and error, here’s all everything you need to know packaged into one resource.
: YOU WILL ONLY SEE THIS PAGE ONCE. DON’T MISS THIS INCREDIBLE DEAL
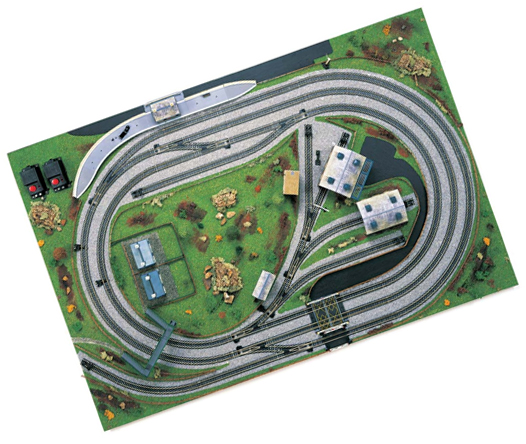
 Click Image to View Offer
Today only, I’m offering a rare 42.5% discount on my popular Model Railroading How To system.
In the next 5 minutes you can get my entire system (pictured above) for 42.5% off the normal price.
This complete Model Railroading How To System sells everyday for $47.00… Today you can save 42.5% and get the entire package for just $27!

Here’s what to do next:
Model trains is not necessarily an expensive habit but beginners who fall prey to the standard trial and error format of learning how to build model train layouts end up losing motivation due to the costs of making errors. Do not go down this route…spend a few bucks on a guide that will save you hundreds of dollars in the near future. This is the secret that will put you ahead of any other mode train beginner and save you time, money and a whole lot of frustration.
In all of my years, I have found one resource that I’ve always recommended to the model train beginners I coach on a regular basis. It is the best beginner’s book I have ever come across.
In this guide you will learn how to:
- Repair model trains so you don’t have to waste money and time at a hobby shop
- Maintain model trains to look as stunning as when you first acquired them
- Wire the perfect current flow so all of your trains run smoothly at different speed. This is one of the secrets for creating the most realistic model†train†layout possible
- Convert DC to DCC and have intricate layouts with numerous trains on it, following their daily routes at varying speeds with no power issues
- Create terrain and buildings from scratch , this will help you to build the layout of your dreams and save you tons of money on buildings, which are some of the most expensive accessories of a model railroad
- Avoid common mistakes that every beginner makes that costs time, money and lots of frustration
- Find cheap model train stuff, so you can free up your budget to spend on additional details for your model railroad
- Build model train layout plans that will have your railroad looking display ready very quickly
- And a ton of other valuable information that would take 10 to 15 different books, sitting on forums threads filtering the amateur hour content from the real deal content from experts. Get all of the information you need to build a model train layout all in one place
I can honestly say that this information guide is the best investment for model train beginners and past railroaders.
The main benefit is the the fact that an expert has put everything you ever need to know about building your first model train layout into one place and also provides a “members only” online library of video tips, tricks and secrets.
It may set you back a few bucks but the information is so valuable that it comes with a 60 Day Money Back Guarantee. This guarantee allows you to get a complete refund if you don’t like it. No risk on your end, sounds like a no brainer!
View Model Train Book for Beginners – what do you have to lose?

Sincerely,
James “Jim” Reynolds
Model Train Expert