Top Rated Track Plans for Model Train Beginners
Most beginners to model railroading usually ask “what is the best track plan for beginners?” and the answer is the following:
Have you chosen a scale yet?
Choosing a scale depends on how much space you have available. It’s sometimes a trade off between getting all of the details you’d like within your layout versus reducing the scale size. For example, if the space available is the size of a coffee table running N scale will give you the freedom to add more loops to your track, add more details and run more trains.
Different Ways to Find Track Plans:
- Look at example layouts in magazines or online for track plan ideas
- Use track software to get an idea of what will work in your space
- Just start laying track to see what works but don’t glue it down
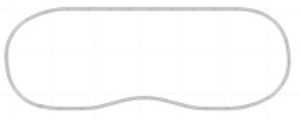
Simple Oval Track Plan
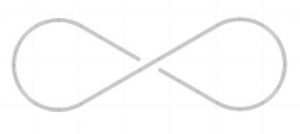
Figure Eight Track Plan
To convert an oval track into a figure eight track plan, first you need to break apart the standard oval track and remove the straight pieces and interchange them with 4 curved segments that will be added onto the exposed end of each section you just seperated from the oval track.
You’ll end up with two circles that look ¾ complete but are lacking the middle part to connect them together. Now take your 90 degree crossover track piece and add 4 straight pieces to it by adding one track piece to each side of the 90 degree crossover track piece.
Final step is to simply take the remaining straight track pieces from the oval layout that you had separated and reattach them back to complete the figure eight track plan.
Dog Bone Track Plan
A dogbone is basically a double track loop to loop model railway layout. If your spacing and benchwork has room for loops then any double tracked plan can be converted into a dogbone layout. On layouts that are larger, all of the loops can be hidden and to save space they can be stacked as well.
With smaller sized layouts, this dogbone is usually folded over with the loops left open or only partially hidden. Even with smaller layouts, the loops can potentially be stacked to save space. The biggest advantage utilizing a dogbone track plan is that the trains can be turned on both sides of the mainline without having to back trains in and out of a wye (where two railroads join into a “Y”)
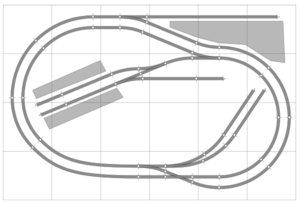
Folding Eight Track Plan
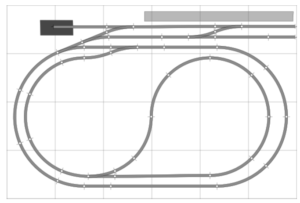
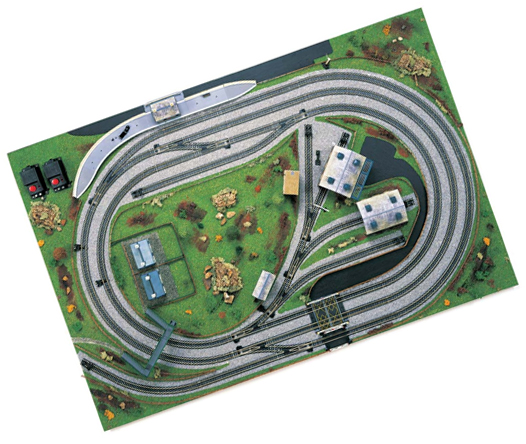
This plan has only one running track that runs around two ovals, giving a long run between the inner and outer stations.
DMUs or railcar services would be well suited to this layout, and freight trains (shunted on the sidings bottom right) offer alternative traction.
It would be possible to run two trains on this layout using a DCC system, but you’d have to be very careful not to crash– either by catching up with the train in front or, more spectacularly, on the crossing between the loops!
Oval with Return Loop
This plan requires either the wiring up of a double-pole double-throw switch on the reverse loop, or the use of a designated DCC accessory to enable this feature to work seamlessly.
Trains are run from the terminating station at the top of the plan, around the main oval. They are then switched onto the reverse loop section, so that the train returns loco-first, and back into the station – the loco can then run around the train and start the cycle again.
If steam operation is desired a turntable may be added, whilst a station could also be constructed in the reverse loop to give trains a chance to stop whilst the polarity switch is made.
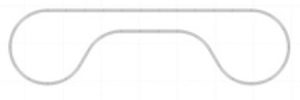
Stretch Oval Track Plan
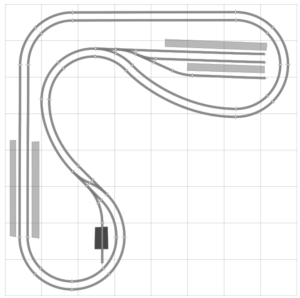
Filling the corner of the room, this stretched oval is similar to my favorite layout at Buffers cafe, at Back of the Hill Farm near Bolton Abbey. Two stations are included, and plenty more embellishments can be made to your specification – these could include freight facilities, a loco depot with
turntable, or even a third station using an upper-level branch
line.
Stretch Eight Track Plan
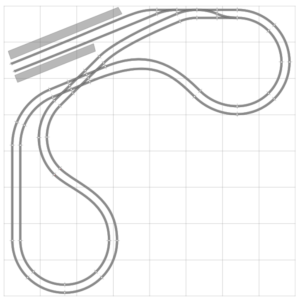
Based on a similar concept to the stretched oval, this plan uses a double crossover to make room for a large terminus station in the top right corner. Whilst the crossover increases the operating could be avoided by constructing the layout on two levels. The station would form part of the upper layer, with tracks running down to the lower level in the top right corner and at the front of the lower left turn.
Circle w/ Sidings Track Plan
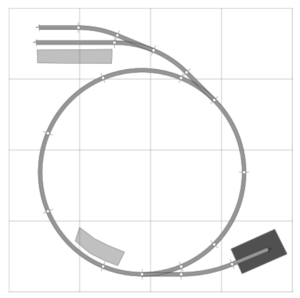
An ideal start for a younger modeler, this simple plan allows you to run trains in a clockwise direction. Coaches or wagons can then be collected or delivered to each of the sidings, with a small platform in the top left corner and a goods shed on the opposite side.
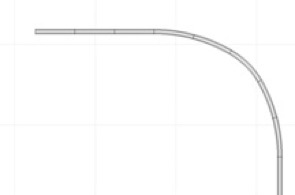
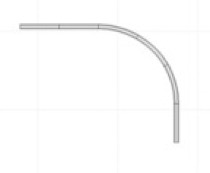
When laying curved track, you should use an easement, which eases your way into and out of the curve.
In other words, start your curve with a larger radius, then ease into the tighter radius, then come out of the curve again with a larger radius. Your trains will look better going around the curve that way.
Easement
No Easement
Many common terminology comes up when searching for track plans. Familiarize yourself with the terms below to gain a better understanding of different types of track layouts.
- Shortline: A shortline railroad is a small or mid-sized railroad company that operates over a relatively short distance relative to larger, national railroad networks.
- Runaround Track: It is two tracks side by side, connected by turnouts at each end.
- Cutoff Track: A railroad (or railway) cutoff (or cut-off) is a new railroad line built to replace or supplement an existing route, typically one where the old line is deficient for some reason.
- Easement: Instead of your train having a tight radius when turning, the track radius is much wider, which helps provide smooth turning for the locomotive
Next, learn detailed step by step directions on the following:
- How to pick and build the perfect layout to suit your budget and the space you have available? One that will provide loads of fun for years to come
- A full glossary to explain the model train language
- All the track cleaning methods explained and what not to do. Easy ways to maintain and keep your layout clean… easily keep your trees and scenery free from dust and cobwebs
- The 4 different track options explained and compared to allow you to make an informed decision on what you should be using
- The best way to create grassed meadows and fields and fire scenes!
- What repairs you should do yourself and when you should use an experienced repairer
- The secrets to creating realism and an aged look… how to create rust, mud and tire marks on your rolling stock
- Handling common track features – turnouts, reversing loops
- How do you convert your analog layout to a DCC system and should you even consider DCC?
- How to avoid those frustrating electrical shorts on your turnouts?
The most important part to building a model railroad is knowing exact step-by-step directions for planning, designing and building ahead of time. To avoid endless frustration due to limited space, derailment/wiring issues and wasted time trying to figure out, understanding the fundamental steps is crucial. The best feeling in the world as a model railroader is enjoying a fully operational layout with all the bells and whistles.
To master model railroad building will take countless hours trying to figure out the exact process for each part.
You must know each of the bullet points above to ensure your locomotives do not have erratic stops, derailments or lack of speed on gradients. and is a fully functional realistic model train layout.
Fortunately, you don’t have to spend hours and money with trial and error, here’s everything you need to know packaged into one resource.
: YOU WILL ONLY SEE THIS PAGE ONCE. DON’T MISS THIS INCREDIBLE DEAL
Click for Instant Access
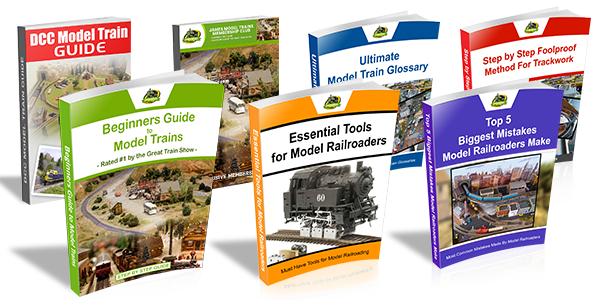
In the next 5 minutes you can get my entire system (pictured above) for 48.5% off the normal price.
This complete Model Railroading How To System sells everyday for $97.00… Today you can save 48.5% and get the entire package for just $47!
In this book you will learn how to:
- Repair model trains so you don’t have to waste money and time at a hobby shop
- Maintain model trains to look as stunning as when you first acquired them
- Wire the perfect current flow so all of your trains run smoothly at different speed. This is one of the secrets for creating the most realistic model train layout possible
- Convert DC to DCC and have intricate layouts with numerous trains on it, following their daily routes at varying speeds with no power issues
- Create terrain and buildings from scratch , this will help you to build the layout of your dreams and save you tons of money on buildings, which are some of the most expensive accessories of a model railroad
- Avoid common mistakes that every beginner makes that costs time, money and lots of frustration
- Find cheap model train stuff, so you can free up your budget to spend on additional details for your model railroad
- Build model train layout plans that will have your railroad looking display ready very quickly
- And a ton of other valuable information that would take 10 to 15 different books, sitting on forums threads filtering the amateur hour content from the real deal content from experts. Get all of the information you need to build a model train layout all in one place
I can honestly say that this information guide is the best investment for model train beginners and past railroaders.
The main benefit is the the fact that an expert has put everything you ever need to know about building your first model train layout into one place and also provides a “members only” online library of video tips, tricks and secrets.
It may set you back a few bucks but the information is so valuable that it comes with a 60 Day Money Back Guarantee. This guarantee allows you to get a complete refund if you don’t like it. No risk on your end, sounds like a no brainer!
View Model Train Book for Beginners – what do you have to lose?

Sincerely,
James “Jim” Reynolds
Model Train Expert
